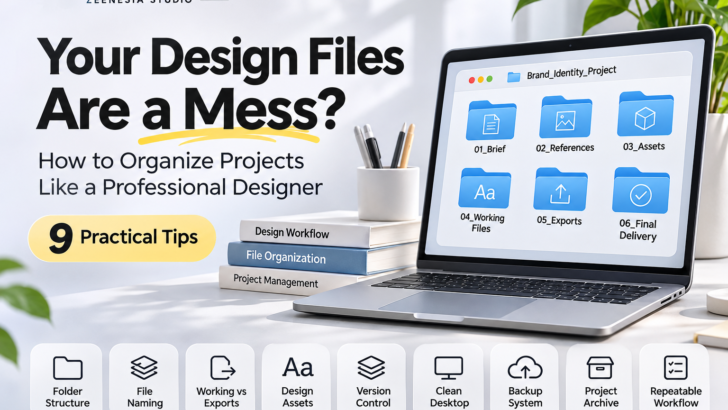
Your Design Files Are a Mess? How to Organize Projects Like a Professional Designer
Have you ever spent 15 minutes searching for a logo file, only to find several versions named “final,” “final-new,” and “final-revised”?
If that sounds familiar, you’re not alone.
For graphic designers, managing files is just as important as creating great designs. Between client briefs, reference images, working documents, fonts, mockups, and final exports, a single project can quickly become difficult to manage.
The problem isn’t necessarily that you have too many files. It’s that you don’t have a system for organizing them.
Poor file management can waste valuable time, make revisions more complicated, increase the risk of losing important work, and create unnecessary stress throughout the design process.
The good news? You don’t need complicated software or an expensive productivity system to fix it. With a few practical habits and a consistent folder structure, you can build a cleaner, more efficient workflow that makes every project easier to manage.
Here are nine practical ways to organize your design files like a professional.
1. Create a Consistent Folder Structure for Every Project
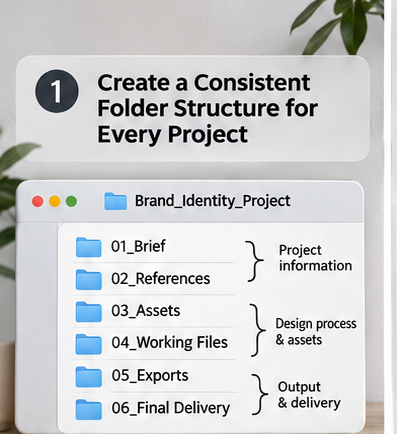
One of the easiest ways to improve your design workflow is to establish a standard folder structure for every project.
Without a clear system, files often end up scattered across different locations. Your client brief might be in Downloads, reference images on your desktop, and working documents somewhere else entirely. This makes even simple tasks unnecessarily time-consuming.
Instead, create a master project folder with dedicated subfolders for each stage of your workflow.
Brand Identity Project/
01_Brief
02_References
03_Assets
04_Working Files
05_Exports
06_Final Delivery
Brief: Client instructions, project requirements, and important information.
References: Moodboards, inspiration, and visual references.
Assets: Images, logos, icons, and other supporting materials.
Working Files: Editable design documents and ongoing revisions.
Exports: Files prepared for web, social media, and print.
Final Delivery: Approved files ready to send to the client.
The exact folder names aren’t important. What matters is using the same structure consistently. Professional tip: Create a reusable project folder template. Whenever you start a new project, simply duplicate the template instead of building everything from scratch.
2. Stop Naming Your Files “Final Final 2”
Have you ever opened three different files just to figure out which one contains the latest design?
Unclear file names are one of the most common causes of confusion in creative workflows. Names such as Untitled-1, Logo-Final, or Final-Version-New might seem convenient when you’re working under pressure, but they become difficult to manage as a project develops.
A better approach is to establish a consistent file naming convention.
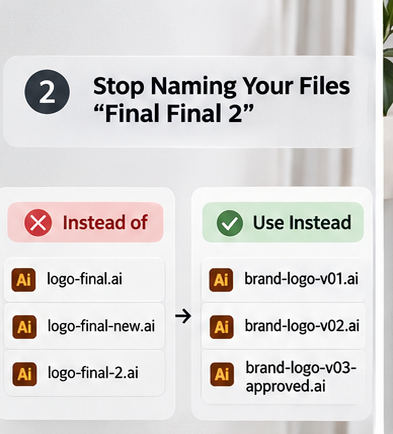
Avoid names like:
logo-final.ai
logo-final-new.ai
logo-final-2.ai
Use descriptive names instead:
brand-logo-v01.ai
brand-logo-v02.ai
brand-logo-v03-approved.ai
You can also include the project name, design category, or date when necessary. For example: ClientName_BrandLogo_v03_2026-11-05.ai
A good file name should tell you three things: what the file contains, which version it is, and whether it is approved or still in progress. This simple habit makes searching, sharing, and managing revisions significantly easier.
3. Separate Working Files From Final Exports
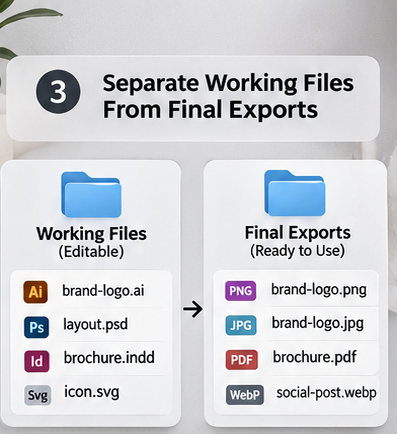
Your editable design files and final exported files serve two completely different purposes. Keeping them together can create confusion, especially when a client requests changes after delivery.
Working files contain the original design elements, layers, effects, and editable components. Final exports, on the other hand, are prepared for specific applications and are often ready to publish, print, or distribute.
Keep these two categories separate.
Working Files: AI (Adobe Illustrator), PSD (Adobe Photoshop), INDD (Adobe InDesign), EPS, SVG.
Final Exports: PNG, JPG, PDF, SVG, WebP.
For larger projects, organize exports into Social Media, Website, Print, Presentation, and Client Delivery folders.
This prevents accidental delivery of unfinished documents and makes future updates much easier. Professional tip: Always keep an untouched copy of your approved source files. You’ll appreciate having it when a client requests changes months after the project is completed.
4. Organize Your Fonts and Design Assets
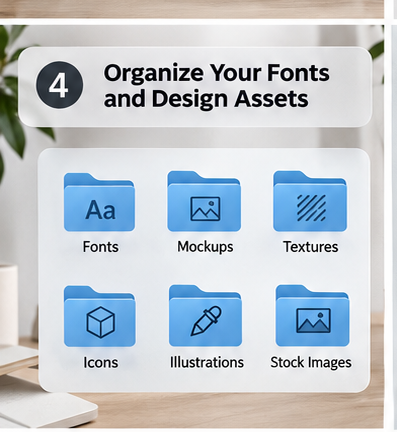
A designer’s asset library can quickly become overwhelming. Fonts, mockups, textures, icons, illustrations, and stock images are valuable resources, but downloading them without a proper organization system can turn your creative library into a digital storage mess.
Instead of keeping everything in one location, create dedicated folders based on asset categories.
Fonts
Mockups
Textures
Icons
Illustrations
Stock Images
For fonts, consider grouping them by typeface category, such as serif, sans serif, script, and display. You can also organize them by family or project if you work with a large font collection. For mockups and textures, use descriptive folder names that make individual resources easy to identify. If you use commercial fonts, stock images, or other licensed resources for client projects, keep the relevant license information and purchase records alongside your project assets. An organized asset library saves time and helps you avoid unnecessary licensing problems.
5. Use Version Control Instead of Overwriting Your Work
Design is rarely a straight line from the first concept to the final result. You experiment, make adjustments, receive feedback, and sometimes need to return to an earlier direction.
That’s why saving different versions of your work is essential. One common mistake is repeatedly saving over the same document. While this keeps your folder looking clean, it removes access to earlier versions that might become useful later.
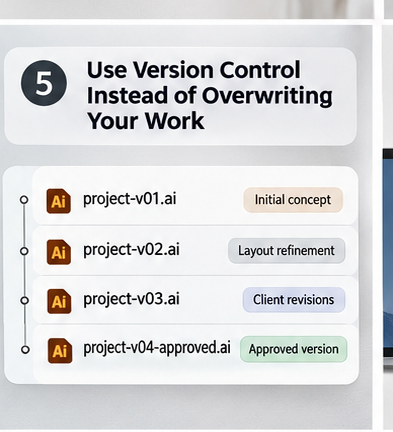
Instead, create a simple version control system.
project-v01.ai — Initial concept
project-v02.ai — Layout refinement
project-v03.ai — Client revisions
project-v04-approved.ai — Approved version
You don’t need to save every tiny adjustment as a separate file. Focus on important milestones, such as major design changes, client feedback, and approved concepts. For collaborative projects, cloud storage services with version history can provide additional protection. The goal is simple: never let an important design decision disappear because you accidentally overwrote the wrong file.
6. Keep Your Desktop Clean
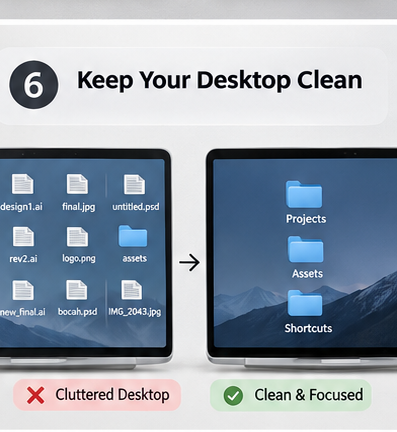
Your desktop should be a workspace, not a dumping ground for unfinished projects. It’s easy to save files temporarily on your desktop because it’s convenient. But over time, temporary files become permanent clutter.
Screenshots, downloaded references, exported graphics, and unfinished documents can quickly fill your screen with files you no longer need. A cluttered desktop also makes it harder to locate important documents and maintain a consistent workflow.
Use your desktop for shortcuts to frequently accessed folders.
Move active projects into their designated project folders.
Delete unnecessary temporary files and duplicate downloads.
Store screenshots and references in the appropriate project folders.
Review your desktop regularly and remove files that no longer belong there.
You don’t need an entirely empty desktop, but everything on it should have a purpose. A cleaner digital workspace makes it easier to focus on the creative work that actually matters.
7. Create a Reliable Backup System
Imagine losing an entire client project because your computer suddenly stops working. Hours of design work, important references, editable documents, and final deliverables could disappear in an instant.
Hardware failures, accidental deletions, and corrupted files can happen to anyone. That’s why backing up your design projects should be a regular part of your workflow, not something you think about only when a problem occurs.
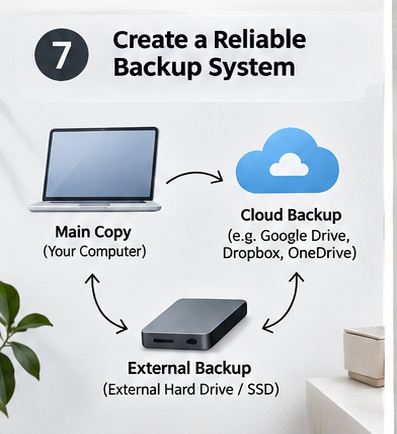
A practical approach is to maintain three copies of important files.
Primary Copy: Your active project files stored on your computer.
External Backup: A copy stored on an external hard drive or SSD.
Cloud Backup: An additional copy stored using services such as Google Drive, Dropbox, or OneDrive.
Make sure your backups are updated regularly, particularly when working on important client projects. Periodically check that your backup files can actually be opened and restored. Remember, a backup is only useful if you can recover your work when you need it.
8. Archive Completed Projects Properly
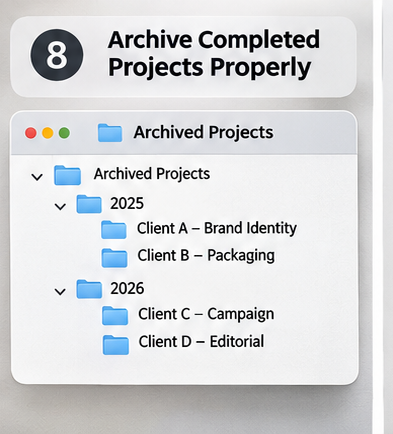
Not every project needs to stay in your active workspace forever. Once a project has been approved, delivered, and completed, move it into a dedicated archive folder.
This keeps your active workspace clean while preserving important files for future reference. A simple way to organize archived projects is by year and client.
Archived Projects/
2025 / Client A – Brand Identity / Client B – Packaging
2026 / Client C – Campaign / Client D – Editorial
Before archiving, collect the final approved exports, editable source files, project references and assets, relevant fonts and license information, and client briefs or important documentation. Consider keeping a short README file that explains the project contents and any important notes. Don’t rely on archived files as your only backup; keep a separate backup copy of important projects.
9. Build a Repeatable Workflow
The best file organization system isn’t necessarily the most complicated one. It’s the one you can follow consistently.
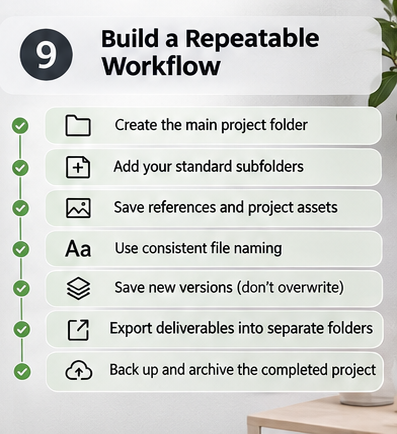
You might have a perfect folder structure, but if you don’t use it every time you start a new project, your files will eventually become disorganized again. The solution is to turn your organization system into a repeatable routine.
Create the main project folder.
Add your standard subfolders.
Save project briefs, references, and assets in their designated locations.
Use consistent file naming conventions.
Save important versions instead of overwriting your work.
Separate editable documents from final exports.
Back up your files regularly.
Archive the project once everything has been completed and delivered.
You can make this process even easier by creating a reusable project folder template and a simple checklist. Over time, these steps will become a natural part of your design process rather than another task you have to think about. Consistency is what turns a collection of folders into a professional file management system.
Final Thoughts: Better File Organization, Better Design Workflow
Great design isn’t only about choosing the right colors, typography, or composition. It’s also about having an efficient process behind every creative decision.
Disorganized files can slow you down, complicate client revisions, and make even simple projects unnecessarily frustrating.
By creating a consistent folder structure, using clear file names, managing design assets, saving multiple versions, and maintaining reliable backups, you can build a workflow that supports both your creativity and productivity.
You don’t have to implement everything at once. Start with one project, apply these practices, and gradually make them part of your everyday routine.
The less time you spend searching for files, the more time you have to focus on creating better designs.