Article: 30 Days of Instagram Content Ideas Graphic Designer

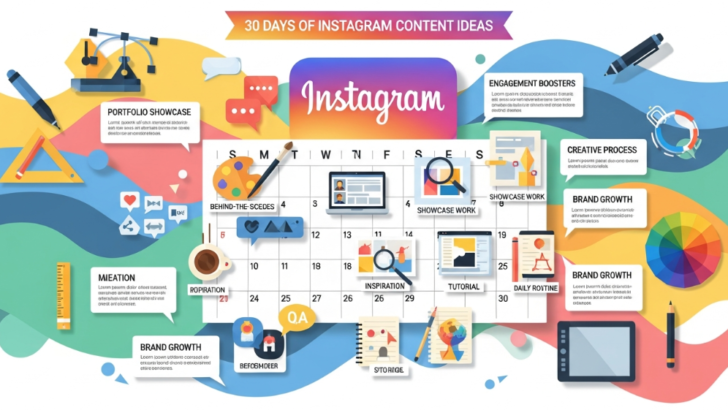
Creating consistent content can be overwhelming. Yet, it becomes much easier when you follow a structured plan. That is why this guide on 30 days of Instagram content ideas graphic designer will help you build a clear and stress-free posting strategy. The goal is to publish daily content that boosts engagement, strengthens your personal brand, and helps you attract quality clients.

In this article, you will discover one full month of creative content ideas designed specifically for modern graphic designers. Each idea is crafted to help you show your skills, process, and personality. Additionally, every idea supports your ability to stand out in a competitive industry. When you follow these ideas for 30 days, you will develop consistency while growing your Instagram presence with purpose.


What Makes These 30 Days of Instagram Content Ideas Graphic Designer-Friendly?

This plan works because it blends creativity with strategy. Many designers post work without a system. Therefore, they lose momentum quickly. However, with a clear schedule, you save time and avoid confusion. This helps you post more confidently. These ideas are also easy to execute, even when you have limited time.


30 Days of Instagram Content Ideas Graphic Designer

Below are the daily ideas you can follow for a full month. You can repeat this cycle every 30 days if you want steady engagement.


Day 1: Portfolio Highlight

Share a signature project. Add a short story about how you created it. This sets the tone for the month.

Day 2: Before and After Design

Show transformation. Many people enjoy seeing progress and improvement.

Day 3: Behind-the-Scenes Workspace

Share your setup. Keep it clean, simple, and relatable.

Day 4: Moodboard Inspiration

Post a collage of references that influence your style.

Day 5: Time-Lapse of a Design

Record a quick process. Short videos increase retention.

Day 6: Client Testimonial

People trust designers who show real feedback.

Day 7: Speed Logo Concept

Create a simple logo concept for fun. This builds authority.

Day 8: Share Your Favorite Tools

Talk about software or equipment you use daily.

Day 9: Typography Showcase

Highlight a font you love. Explain why it works well in different projects.

Day 10: Color Palette Recommendation

Share a ready-to-use color scheme. Designers and non-designers love these resources.

Day 11: Quick Design Tip

Give a short tip about layout, spacing, or color theory.

Day 12: Viral Reel Trend Adaptation

Use a trending audio. Connect it with your niche.

Day 13: Repost of Your Best-performing Content

Bring back something that performed well. It helps with reach.

Day 14: Logo Case Study

Explain a concept, problem, and your solution.

Day 15: Design Challenge

Create a fun challenge. For example: “Redesign a famous brand in 15 minutes.”

Day 16: Work-in-Progress Snapshot

Show something unfinished. People enjoy authentic content.

Day 17: Q&A Answer Post

Pick a common question from your audience and answer it creatively.

Day 18: Free Resource Share

Offer a mockup or template. This helps grow your follower loyalty.

Day 19: Client Project Breakdown

Show how you solved a specific client need.

Day 20: Meme for Designers

Light humor keeps your page entertaining.

Day 21: Tool Comparison Post

Compare tools like Illustrator vs. Photoshop. Keep it neutral.

Day 22: Personal Story About Your Journey

Authenticity builds deeper connections.

Day 23: Carousel of Micro Tips

Turn 5–8 small tips into a helpful carousel.

Day 24: Case Study Reel

Convert a project breakdown into a short vertical video.

Day 25: Industry Trend Commentary

Share your view on a current graphic design trend. Include an external reference (e.g., Adobe’s design trend report).

(Authoritative Source Example: Adobe 2025 Design Trends Report)

Day 26: Typography vs. Hand Lettering Comparison

Teach the difference with visuals.

Day 27: Your Daily Routine as a Graphic Designer

People like seeing real habits from creative professionals.

Day 28: Inspirational Quote Graphic

Design a simple quote card. These often get high saves.

Day 29: Collaboration Post

Introduce a friend or another creator. Tag them.

Day 30: Monthly Recap

Share highlights from your month and your growth summary.


How to Use the 30 Days of Instagram Content Ideas Graphic Designer Plan Effectively

You can complete this plan with less stress when you prepare your content weekly. Batch creation prevents burnout. Additionally, you can mix formats such as Reels, carousels, stories, and static posts. Consistency helps grow your audience. However, creativity keeps them engaged. Always pair your visuals with clean captions and relevant hashtags.

Another effective strategy is repurposing your content. For example, a carousel can become a Reel, and a moodboard can turn into a story sequence. This saves time while increasing reach.


Tips for Maximizing Engagement With This 30-Day Plan

Engagement requires interaction. Therefore, you should respond to comments quickly. You can also ask questions at the end of your captions. This encourages conversation.

Additionally, use call-to-action prompts such as:

  • “Save this post for later.”

  • “Comment your favorite design tool.”

  • “Tag a designer friend.”

Small prompts can significantly increase visibility.

You may also create a highlight titled “30 Days” to store your daily posts. This helps new visitors see your expertise immediately.

[Insert internal link to related article here]


Final Thoughts

Following these 30 days of Instagram content ideas graphic designer will help you post consistently without running out of ideas. You will improve your brand presence, grow your audience, and showcase your creative skills in a structured way. When used repeatedly, this plan becomes a powerful system that brings long-term results.


FAQ

1. How do I stay consistent with this 30-day plan?

Prepare your content in batches. This makes the entire process smoother and more organized.

2. Can beginners use these ideas?

Yes. Every idea is simple and adaptable for all skill levels.

3. How often should I repeat this cycle?

You can repeat it monthly or adjust the days based on what your audience engages with the most.

4. Do I need expensive tools to create these posts?

No. Free tools like Canva work well for most content types.

5. Will this plan help me attract clients?

Yes. Consistent and strategic posting builds trust and positions you as a reliable designer.


Zeenesia Studio – Fonts that elevate your project.

Portfolio Design Tips: How to Showcase Your Work to Land Clients or Jobs

Introduction

A well-crafted portfolio is the cornerstone of a successful graphic design career. Whether you’re a freelance designer, a recent graduate, or a seasoned professional, your portfolio serves as the first impression for potential clients and employers. It demonstrates your skills, creativity, and unique style—helping you stand out in a competitive industry.

In this guide, we’ll cover how to design an effective portfolio, common mistakes to avoid, and actionable tips to showcase your work to attract clients or land your dream job.


Why a Strong Portfolio Matters

Your portfolio is more than just a collection of your work—it’s your professional story. A strong portfolio:

  • Highlights your skills and versatility

  • Demonstrates problem-solving and creativity

  • Establishes your personal brand and style

  • Builds credibility and trust with clients or employers

Remember: quality always trumps quantity. A portfolio with fewer, stronger projects is better than one overloaded with weak examples.


Step 1: Curate Your Best Work

Not every project deserves a place in your portfolio. Select work that:

  • Represents your core skills and strengths

  • Shows a diverse range of styles and mediums

  • Highlights real results or impact (e.g., increased client engagement, brand recognition)

  • Includes personal projects if they demonstrate creativity and initiative

Tip: Aim for 8–15 high-quality pieces—enough to showcase range without overwhelming viewers.


Step 2: Tell a Story for Each Project

Each project should include a mini-case study that explains:

  • The challenge: What problem did the client or project face?

  • Your approach: How did you solve it?

  • The outcome: Results, metrics, or client feedback

  • Skills and tools used: Photoshop, Illustrator, Figma, etc.

This format allows viewers to understand your design thinking and strategic approach, not just the final visuals.


Step 3: Organize Your Portfolio Effectively

A clean, easy-to-navigate structure improves usability:

  • Start with your best project to capture attention immediately

  • Group projects by category (branding, UI/UX, illustration, etc.)

  • Include a short introduction for yourself and your design philosophy

  • Make sure navigation is simple on both desktop and mobile

Tip: Online portfolios should load quickly and be responsive for all devices.


Step 4: Show Your Process

Clients and employers love seeing your design process. Include:

  • Sketches, wireframes, or mood boards

  • Iterations and revisions

  • Before-and-after examples

  • Insights into decision-making

Showing your process proves problem-solving skills and communicates that you are thoughtful, methodical, and professional.


Step 5: Include Testimonials and Results

Adding client feedback or measurable outcomes makes your portfolio more credible:

  • Short quotes from satisfied clients

  • Metrics like social engagement, conversion rates, or project impact

  • Any awards or recognitions received

This social proof reassures prospective clients or employers that you deliver real results.


Step 6: Optimize for Online Visibility

For digital portfolios, SEO matters:

  • Use descriptive file names and alt text for images

  • Include keywords like “graphic designer portfolio,” “UI/UX designer,” “branding design”

  • Write engaging project descriptions

  • Link to your social media or professional profiles (LinkedIn, Behance, Dribbble)

A portfolio that’s discoverable online increases your chances of landing work.


Step 7: Keep It Updated

A portfolio is never “finished.” Regularly:

  • Remove outdated or weaker projects

  • Add new work that reflects your current skills

  • Update testimonials and results

Consistency shows growth and professionalism.


Step 8: Make It Personal

Let your personality shine through:

  • Include a bio with your story and design philosophy

  • Share behind-the-scenes photos or creative habits

  • Maintain a consistent visual style across your portfolio

A personal touch helps clients connect with you beyond your work.


Common Portfolio Mistakes to Avoid

  • Overloading with too many projects

  • Poor navigation or cluttered layouts

  • Low-quality images or screenshots

  • Not explaining your role or contributions

  • Forgetting to update regularly

Avoiding these ensures your portfolio makes a strong professional impression.


Conclusion

A strong graphic design portfolio is your ticket to landing clients or your dream job. By curating your best work, telling compelling stories, showcasing your process, and optimizing for online visibility, you can demonstrate your creativity, skills, and professionalism.

Remember: your portfolio is a living document—keep it polished, updated, and reflective of your unique style.

How to Visually Communicate Strategy Without Boring Clients

Most clients say they want “strategy,” but let’s be honest — they don’t want a 60-page PDF. They want clarity. They want to see the strategy, not just read about it. And if your strategic process feels like a business lecture, they’ll skip straight to the visuals.

That’s why the designers who win big in 2025 are the ones who can express complex thinking in a way that feels visual, simple, and persuasive.

This article breaks down how to make strategy tangible, visual, and exciting — so clients understand its value and happily pay for it.


🔥 Why “Strategy Decks” Are Failing Clients

Traditional strategy presentations go wrong because they are:

❌ Too long
❌ Too text-heavy
❌ Focused on theory, not outcomes
❌ Lack real-world context
❌ Don’t connect to the final visual output

Clients don’t want to feel like they’re sitting in a college lecture. They want clarity + confidence.


🎯 What Clients Actually Need to See

The best way to present strategy is to show it, not explain it.
Clients understand faster when they see:

✔ Visual frameworks
✔ Brand territories
✔ Compare & contrast analysis
✔ Narrative-driven insights
✔ Strategic keywords represented visually
✔ Creative direction tied to business goals

Think: Strategy as storytelling.


🧠 5 Ways to Make Strategy Visual (Without Dumbing It Down)

1. Use Frameworks Instead of Walls of Text

Turn long text into diagrams, grids, lenses, maps, journeys.
Example: Instead of writing “Brand Differentiators,” show a Positioning Map.


2. Use Visual Territories

Present multiple strategic directions visually like “worlds” or “universes.”
This helps clients participate in the decision instead of just listening.


3. Include Real-World Examples

Show screenshots, packaging, website references, color, typography, emotional cues.
Your strategy becomes instantly understandable.


4. Pair Each Insight With Design Implications

Example:

Insight: Customers value transparency.
Design Implication: Minimal packaging, open messaging, storytelling hierarchy.

Now your client sees the strategy in action.


5. Use Narrative Language

Replace “Brand Pillars” with:

  • What we believe

  • What we stand against

  • What we promise

  • What we refuse to do

No jargon. Just clarity.


⚡ What This Looks Like in Practice

Instead of:

“Brand Voice Attributes: Bold, Human, Dynamic”

Use:
🗣 “How we speak to our audience”
👎 We don’t sound corporate
👍 We sound like someone worth listening to
💬 Example phrases written in that voice

See how much more effective that is?


🧩 The Secret: Strategy Should Feel Like Design

Your strategy deliverable should feel like a design presentation:

  • Intentional layout

  • Hierarchy

  • Visual thinking

  • Brand personality

  • Editorial tone

  • Clear outcomes

Because if strategy doesn’t feel valuable… clients won’t pay for it.


💡 Final Thought

Design is not just how it looks — and strategy is not just what it says.
Your job as a modern designer is to merge both so clients see the value before you even show a single logo.