Affinity vs Photoshop: A Complete Comparison for Designers and Photographers

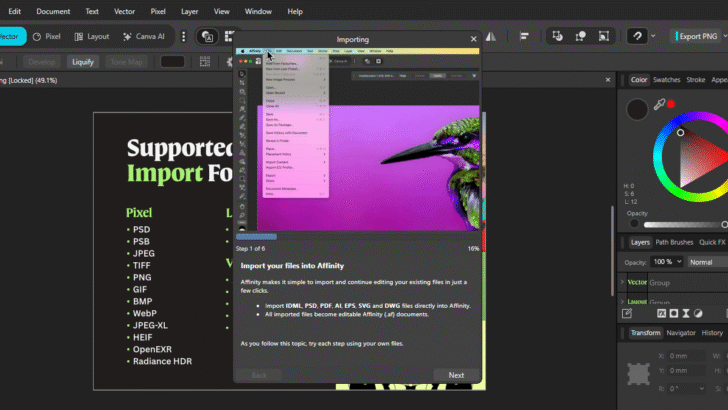
When comparing affinity vs photoshop, many creators feel unsure about which tool is the right one for their work. This guide breaks down the differences clearly, so you can choose the software that fits your style, budget, and workflow. Because the “affinity vs photoshop” debate has grown over the years, understanding key strengths, weaknesses, and practical use cases is essential before making a decision.

What You Will Learn in This Guide

This article explains features, pricing, performance, compatibility, creative tools, and workflow advantages. It also provides real-world examples to help you decide confidently between Affinity and Adobe Photoshop. Additionally, we include an internal link placeholder and an authoritative outbound resource for further reading.


What Is the Main Difference Between Affinity and Photoshop?

The core distinction in the affinity vs photoshop comparison lies in the business model. Affinity uses a one-time payment, while Photoshop requires a subscription. Although both tools offer strong editing capabilities, their ecosystems and professional expectations differ.

Professionals who rely heavily on industry-standard tools often choose Photoshop. However, many independent designers, hobbyists, and freelancers now prefer Affinity for its speed and affordability.


Why the Affinity vs Photoshop Comparison Matters

The software you choose affects productivity, output quality, and long-term cost. Additionally, switching tools later can disrupt your workflow. Therefore, understanding both platforms helps you avoid unnecessary learning curves and financial surprises.

Both programs offer:

  • Advanced photo editing

  • Layer-based manipulation

  • Non-destructive features

  • Support for digital drawing

  • RAW processing

  • Compatibility with tablets and stylus devices

However, the execution and depth of these features differ.


Feature Comparison Overview

Key Features in the Affinity vs Photoshop Debate

1. User Interface and Ease of Use

Affinity is known for a clean, beginner-friendly interface. Photoshop, meanwhile, has more tools visible by default. Because of that, Photoshop can feel overwhelming at first, but it also provides professional-level flexibility that experts demand.

New users often report that Affinity feels faster to learn. However, long-time designers feel more at home using Photoshop’s layout and tool library.

2. Editing Power and Tools

When comparing affinity vs photoshop, Photoshop still leads in advanced features. Tools like Content-Aware Fill, Neural Filters, and AI-powered selections give it an edge. These tools save time and allow designers to complete complex tasks with minimal effort.

Affinity, however, is catching up. It offers powerful brushes, blend modes, live filters, and excellent performance. Although it lacks some of Photoshop’s deepest tools, it delivers impressive capabilities for one-time cost software.

3. Performance and Speed

Affinity is famous for being lightweight and fast. It runs smoothly even on mid-range computers. This performance boost comes from modern code optimization.

Photoshop, although powerful, can feel heavier and sometimes requires higher-end hardware. However, recent updates improved performance, especially with GPU acceleration.


Pricing Comparison

Affinity vs Photoshop Pricing Explained

Affinity Pricing

  • One-time payment

  • No subscription

  • Free updates within the same major version

This pricing model appeals to budget-conscious users or freelancers just starting out.

Photoshop Pricing

  • Monthly subscription

  • Often bundled with Adobe Creative Cloud

  • Includes continuous updates and access to Adobe’s broader ecosystem

Because Photoshop is subscription-based, long-term costs are significantly higher. Therefore, users must consider whether recurring payments fit their budget.


Which Software Is Better for Digital Artists?

Digital artists often ask whether Affinity or Photoshop provides better drawing tools. Photoshop remains the industry standard due to its customizable brushes, huge online resources, and compatibility with third-party plugins.

Affinity also supports custom brushes and pen tools. Many artists appreciate its speed and smooth strokes. Therefore, both tools are worthy options, but Photoshop still offers more depth for large-scale professional illustration.


RAW Editing and Photo Manipulation

RAW Processing in the Affinity vs Photoshop Comparison

Photoshop uses Adobe Camera Raw (ACR), a powerful RAW engine trusted by photographers worldwide. It provides advanced color grading, lens corrections, and noise reduction.

Affinity Photo includes a built-in Develop Persona for RAW editing. It is powerful and fast, although not as detailed as ACR. Still, many photographers find Affinity’s RAW tools more than sufficient for professional work.


Workflow and Ecosystem

Adobe’s ecosystem includes Photoshop, Lightroom, Illustrator, Premiere Pro, and more. Files move between programs seamlessly. Therefore, photographers and designers who use multiple Adobe tools often prefer staying inside this ecosystem.

Affinity offers its own trio:

  • Affinity Photo

  • Affinity Designer

  • Affinity Publisher

These apps integrate well together and offer a pleasant alternative. However, the ecosystem is smaller, and fewer third-party resources exist.


File Compatibility

Affinity vs Photoshop File Support

Photoshop uses PSD as its native format. The PSD file type is widely recognized across the industry.

Affinity can open and export PSD files. However, some advanced Photoshop features may not transfer perfectly. For basic to intermediate projects, compatibility is excellent.


Who Should Choose Affinity?

Affinity is ideal for:

  • Freelancers on a budget

  • New designers

  • Photographers who want strong tools without a subscription

  • Users who prefer lightweight software

  • Creators needing performance on modest hardware

Because Affinity offers speed, affordability, and simplicity, it appeals to many independent creators.


Who Should Choose Photoshop?

Photoshop is ideal for:

  • Established designers

  • Agencies that require industry-standard tools

  • Professionals working with complex edits

  • Teams who rely on Adobe collaboration

  • Users needing plugins, automations, and AI tools

Therefore, if your goal is to collaborate with studios or work in a corporate environment, Photoshop remains the safer choice.


Customer Support and Learning Resources

Adobe offers extensive training materials, tutorials, and courses. Affinity provides good documentation, but its ecosystem is smaller. However, the Affinity community is growing rapidly.

For additional learning resources, you may check:
Authoritative Source: Adobe’s official Photoshop learning page (searchable online).


Internal Link Placeholder

For more related insights, read our guide here:
[Insert internal link to related article here]


Conclusion: Which One Wins the Affinity vs Photoshop Battle?

The answer depends on your goals. If you want affordability, speed, and simplicity, Affinity is an excellent choice. If you need advanced capabilities, deep compatibility, and professional workflow tools, Photoshop remains the leader.

Although Affinity challenges Adobe with a solid, budget-friendly alternative, Photoshop still dominates professional spaces. Both tools offer advantages, but the best choice is the one that fits your work style and future goals.


FAQ – Affinity vs Photoshop

Is Affinity as powerful as Photoshop?

Affinity is powerful, but Photoshop still provides more advanced features, especially in AI tools and deep photo manipulation.

Can Affinity open PSD files?

Yes, Affinity can open and export PSD files, although some complex adjustments may not perfectly transfer.

Does Photoshop offer a lifetime license?

No, Photoshop uses a subscription model through Adobe Creative Cloud.

Which one is better for beginners?

Affinity is more beginner-friendly due to its clean interface and one-time pricing.


Zeenesia Studio – Fonts that elevate your project.

The Power of Google Material Icons: Free, Flexible, and Essential for Modern Designers

Introduction

In the fast-moving world of digital design, efficiency and clarity are essential. Whether you’re working on user interfaces, mobile apps, websites, dashboards, or brand presentations, icons play a major role in how users understand and navigate visual content. Among the most reliable, free, and versatile icon libraries available today, Google Material Icons stand out as one of the most widely used resources for designers around the world.

These icons—created under Google’s Material Design system—combine modern aesthetics, consistent proportions, and open-source flexibility. This makes them perfect for designers who want professional, high-quality icons without worrying about licensing issues or compatibility across platforms. In this article, we explore why Google Material Icons are essential, how designers can maximize their potential, and how they elevate workflows across different design environments.


Why Google Material Icons Are Popular Among Designers

1. 100% Free and Open Source

Designers can use Google Material Icons for:

  • Personal projects

  • Commercial work

  • UI/UX design

  • Web and app development

No credit, no attribution, no license fees.

2. Consistent Visual System

Material Icons follow strict geometry rules:

  • Balanced strokes

  • Clear negative space

  • Standardized proportions

This makes any design feel cleaner and more professional.

3. Multiple Styles Available

Google offers many icon variants:

  • Filled

  • Outlined

  • Rounded

  • Sharp

  • Two-tone

Perfect for adapting icons to your branding or product style.

4. Easy to Integrate Anywhere

Material Icons support:

  • Figma

  • Adobe XD

  • Sketch

  • Web development via CDN

  • Android & iOS implementation

  • Canva

  • Any graphic design tool

One library works everywhere.

5. Over 2,800+ Icons

From navigation shortcuts to dynamic UI symbols, Google Material Icons offer vast options, including:

  • Social

  • Device

  • Navigation

  • File management

  • Multimedia

  • Communication

  • E-commerce

  • Alerts & notifications

It’s rare not to find what you need.


How Designers Can Use Google Material Icons Effectively

1. Maintain UI Consistency

Using icons from different libraries can make an interface look messy. Material Icons ensure uniform:

  • Line thickness

  • Curvature

  • Spacing

Perfect for clean UI systems.

2. Speed Up Prototyping

In Figma or XD:

  • Drag

  • Drop

  • Replace

  • Resize without losing quality

Perfect for designing wireframes or MVPs quickly.

3. Enhance Web Accessibility

Material Icons are designed with clarity in mind, even at small sizes. Their simple forms ensure users with visibility challenges can still understand their meaning.

4. Customizable & Scalable

You can:

  • Recolor

  • Re-outline

  • Add shadows

  • Convert to SVG for full editing

The icons adapt to your brand, not the other way around.

5. Great for Branding Systems

Many brands use Material Icons in:

  • Digital interfaces

  • Internal dashboards

  • Client-facing apps

Their modern minimalism fits nearly any design language.


Where to Download Google Material Icons

The official source is:
➡️ Google Fonts – Material Icons Library

There, designers can:

  • Browse icons

  • Download entire packs

  • Copy SVGs

  • Customize weight & fill

  • Integrate via web code

It’s fast, free, and beginner-friendly.


Tips to Maximize Material Icons in Your Design Workflow

  • Pair icons with a consistent typography system (Roboto, Inter, Poppins).

  • Stick to one icon style per project.

  • Use a 1–2px stroke width for cleaner interfaces.

  • Export icons at multiple resolutions for responsive designs.

  • Avoid icon overload—use them only when they add clarity.


Conclusion

Google Material Icons have become a staple in the design community for good reason. They are free, scalable, consistent, and compatible across every platform designers use today. By integrating this icon library into your workflow, you can streamline your projects, maintain visual harmony, and deliver designs that feel professional and intuitive.

Whether you are a UI designer, web developer, illustrator, or brand strategist, Google’s free icon library is an essential resource for elevating visual communication in modern digital experiences.

Creative Projects You Can Design with Inkscape

Inkscape isn’t just another free vector design tool — it’s a creative powerhouse.
As an open-source alternative to Adobe Illustrator, Inkscape gives you professional design capabilities without the subscription fees.

Whether you’re a beginner exploring vector graphics or a pro looking for efficient workflows, Inkscape offers endless creative potential.
Here are some of the best creative projects you can design with Inkscape — and how to make the most out of its features.


1. Logo Design

Inkscape is perfect for creating professional, scalable logos.
With its vector-based tools, you can design clean, precise shapes and typography that look sharp at any size.

What you can do:

  • Sketch your concept using the Pencil or Pen Tool.

  • Align shapes with grids and snapping.

  • Use gradients, blur, and shadows for subtle depth.

💡 Pro Tip: Export your logo in SVG format for infinite scalability — or PNG for quick sharing online.


2. Icon Sets and UI Elements

Need to design a custom icon set or UI buttons?
Inkscape’s alignment tools, path operations, and grid system make it ideal for pixel-perfect interface elements.

Why it works:

  • You can use layers for organized icon sets.

  • Export icons as SVG for web or app development.

  • Combine strokes and fills for minimalist flat icons.

🎯 Great for: App designers, web developers, and freelancers building UI kits.


3. Posters and Print Materials

With Inkscape, you can design high-resolution posters, flyers, and brochures ready for print.
It supports CMYK color workflows, ensuring your colors look consistent on paper.

Design ideas:

  • Create event posters or music festival layouts.

  • Experiment with typography and composition grids.

  • Add texture or gradients for a professional finish.

🖨️ Bonus Tip: Always use the “Document Properties” panel to set your print size and bleed margins correctly.


4. T-Shirt and Merchandise Design

Inkscape integrates well with print-on-demand workflows like Redbubble or Teespring.
Designing T-shirt graphics, stickers, or tote bags becomes easy with vector precision.

What to try:

  • Use bold outlines and limited color palettes.

  • Test how designs look on different shirt colors.

  • Export your design as transparent PNG or PDF for print.

👕 Pro Tip: Combine text and shape tools to create retro or minimalist apparel art.


5. Infographics and Data Visualization

Want to make data look engaging?
Inkscape allows you to visualize information with icons, charts, and clean vector layouts.

Key benefits:

  • Create reusable infographic templates.

  • Use color gradients to highlight important data.

  • Align elements perfectly with snapping and guides.

📊 Best for: Bloggers, marketers, educators, and content creators.


6. Digital Illustrations

If you love drawing, Inkscape’s Bezier Tool and Calligraphy Pen let you create smooth, expressive illustrations.
It’s great for character art, vector portraits, and stylized landscapes.

Creative tip:
Try combining flat colors with gradients and soft shadows to create depth — a technique often used in modern vector art.

🎨 Popular styles: Flat design, geometric art, minimalist vector scenes.


7. Social Media Graphics

Inkscape isn’t just for print — it’s fantastic for digital visuals too.
You can create social media banners, post templates, and story layouts optimized for each platform.

Examples:

  • Instagram quote templates

  • YouTube thumbnails

  • Pinterest pins and infographics

💡 Workflow tip: Use templates for quick resizing and keep reusable brand color palettes.


Conclusion

Inkscape proves that you don’t need expensive software to create professional designs.
From logos and icons to merchandise and infographics, it’s a versatile tool for designers who value creativity and freedom.

The best part?
Because it’s open source, the Inkscape community keeps growing — with new plugins, tutorials, and inspiration appearing every day.

So, open Inkscape, start a blank canvas, and let your ideas flow.
🎨 Creativity begins with a single vector.

📰 Affinity Goes Free: What It Means for Designers in 2025

🧩 Introduction

In a surprising move that’s shaking the design industry, Affinity, the popular creative software suite by Serif, has officially become free for everyone as of 2025.
This bold decision means that tools like Affinity Designer, Affinity Photo, and Affinity Publisher—once known as affordable one-time purchases—are now completely free to download and use.

For many designers tired of monthly subscriptions, this is huge news. Let’s explore what this change means, why Serif made this move, and how it might reshape the future of creative software.


💡 What Is Affinity?

Affinity is a professional creative software suite developed by Serif, a UK-based company.
It includes three main apps:

  • Affinity Designer – vector graphic design (similar to Adobe Illustrator)

  • Affinity Photo – photo editing (rival to Adobe Photoshop)

  • Affinity Publisher – layout design (alternative to Adobe InDesign)

Affinity became famous for its one-time payment model, smooth performance, and Adobe-level power without the price tag.


🧠 Why Did Affinity Become Free?

According to Serif’s official statement, the move to make Affinity free was inspired by a mission to make creative tools accessible to everyone, especially students, freelancers, and small businesses.

However, experts believe there are also strategic reasons behind this:

  1. Building Market Share – Competing directly with Adobe’s dominance.

  2. Community Growth – Encouraging millions of new users to join the ecosystem.

  3. Future Monetization – Offering optional cloud services, plugins, or premium AI features later.

This is a classic example of a “freemium model done right”—give the core tools for free, and expand through ecosystem growth.


✏️ What Designers Are Saying

The design community’s reaction has been overwhelmingly positive. On X (Twitter) and Reddit, many creatives have expressed excitement:

“I’ve been using Affinity Designer for years, and this is a dream come true. It’s now easier to recommend to every new designer.” — @VisualAri, Graphic Designer

Others are calling this the “end of Adobe’s monopoly,” though some remain cautious, waiting to see how Serif will sustain updates and support.


⚙️ What’s Included in the Free Version?

Serif confirmed that all major features remain intact:

  • Full access to Affinity Designer, Photo, and Publisher

  • Available for Windows, macOS, and iPad

  • No time limit, no trial restrictions

  • Access to community support and updates

The only difference: some upcoming features (like AI-assisted editing and cloud sync) may become part of an optional Pro+ subscription.


🆚 Affinity vs Adobe: The 2025 Comparison

FeatureAffinity SuiteAdobe Creative Cloud
PriceFree (2025)$54.99/month
LicenseLifetimeSubscription
PerformanceLightweight, fastHeavier system load
Offline AccessYesLimited
AI ToolsLimited (so far)Advanced (Firefly, Sensei)

Verdict: For most designers, Affinity now offers 95% of what Adobe does, without any cost.


🌍 How to Download Affinity for Free

  1. Visit the official website: https://affinity.serif.com

  2. Choose your platform (Windows, macOS, or iPad)

  3. Download and install the suite

  4. Create a free Serif account to unlock all tools

Make sure you download only from the official source to avoid counterfeit or malware-infected versions.


🧭 Expert Opinion

“This move from Serif reflects a deep understanding of today’s creative economy. By removing price barriers, Affinity becomes a powerful equalizer for designers worldwide.”
Alex Moreno, UI/UX Design Educator & Creative Software Reviewer (2025)


🔮 What’s Next for Affinity?

With millions of new users expected, Serif is likely to focus on:

  • Expanding community tutorials & education

  • Improving AI-powered design features

  • Building a marketplace for plugins and templates

This could turn Affinity into a true open creative platform, rivaling Adobe’s ecosystem in reach and innovation.


🧾 Conclusion

The announcement that Affinity is now free marks a historic moment in design software.
It’s a win for accessibility, creativity, and fair competition. Whether you’re a student, freelancer, or professional, there’s never been a better time to explore what Affinity can do.

Tip: Start with Affinity Designer if you’re new—it’s intuitive, fast, and perfect for logo, illustration, and UI design projects.